If you’re new to shooting photographs of surfing using a water housing I’d recommend looking at Part 1 of my users guide to get up to speed on some basics of using and maintaining your housing.
One of the questions I get asked most often about shooting using a water housing is – which port should I use for my lens?
closely followed by, what settings should I use?
I’m going to deal with the first of these questions in this post, with Part 3 covering how to avoid water drops on your chosen port, there’s two simple techniques that work really well and require no special equipment.
Fisheye Lens = Dome Port
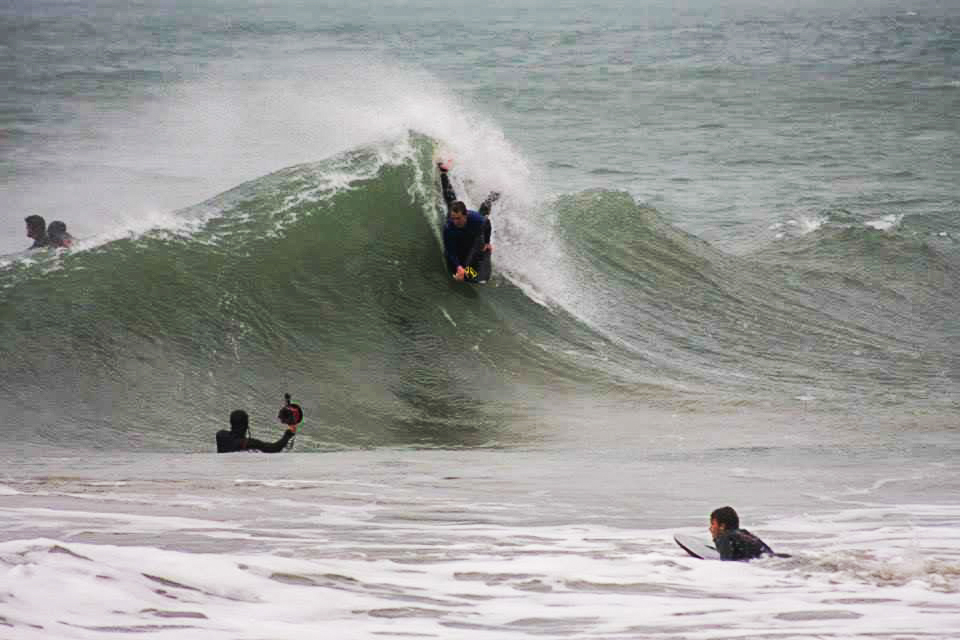
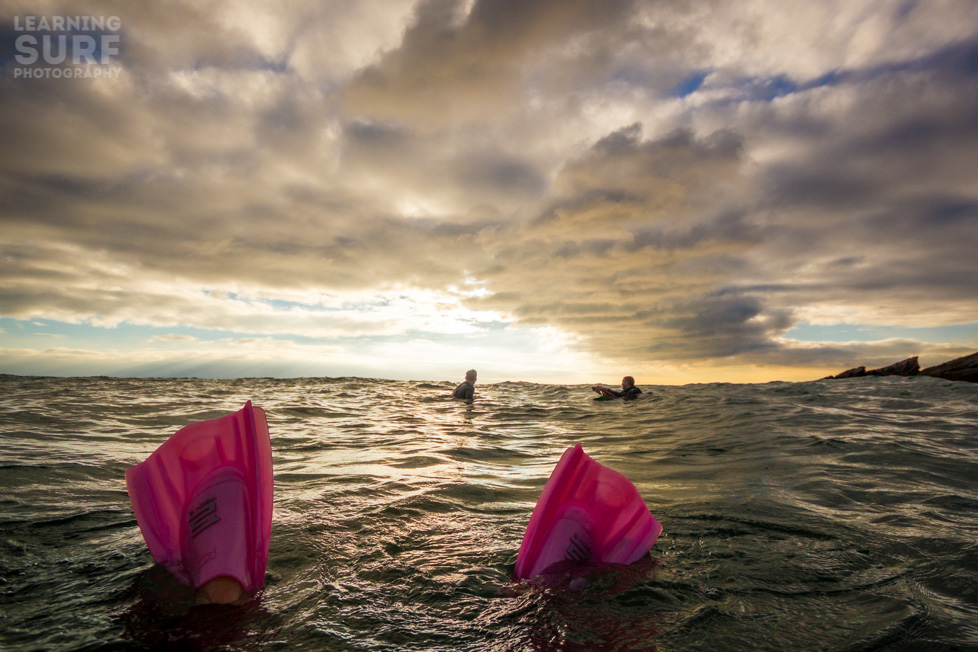
Me shooting with Ben Chandler taking off, photo courtesy of Darren Cocks Photography
In the photograph above, taken by Darren Cocks, you can see me on the left shooting with a dome port, I’m using a very wide Tokina10-17mm fisheye lens, so if I was to use a flat port you would be able to see the edges of the port in the corners of the photo (it would vignette). You can see how wide the lens is in the photo of this wave from my angle.
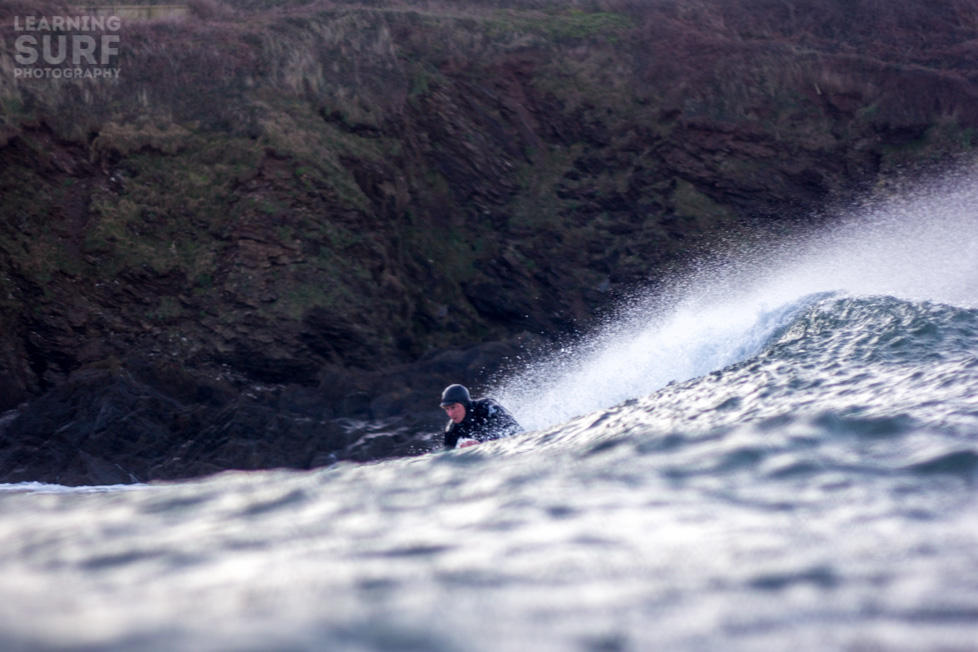
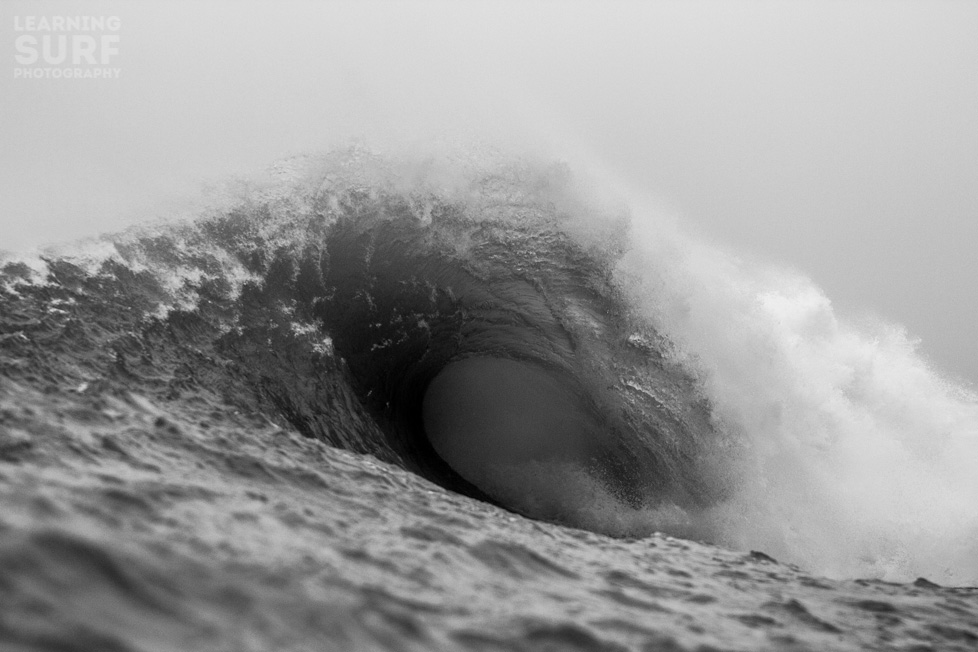
Ben Chandler at Spot M – ISO 500, 10mm, f3.5, 1/1000
As we can see Fisheye lenses can capture so much of the scene they require a clear dome in order to have an unobstructed view, for this kind of above water shot you can use a relatively small dome, most housing manufacturers will offer a port to match your lens if you’re using a popular model like the Tokina 10-17mm or the Canon 8-15mm Fisheye, check out the standard dome ports from Essex, SPL, Aquatech and Liquid Eye for examples.
The smaller the dome the better for the majority of photo’s, it’s less bulky, there’s less area to keep drop free (see Part 3 on water drop prevention), less area to scratch and the lens is less likely to focus on the dome itself if you’re using autofocus (you will want to use manual focus the vast majority of time though), the only reason to go for a bigger dome port is if you also want to shoot underwater or over/under style shots.
Underwater = Dome Port
Shooting underwater with a dome port is not as simple as you might think, the dome creates a virtual image a few inches beyond the outer surface of the dome (the distance to the virtual image depends on the diameter of the dome), meaning you will need to focus on the virtual image, much closer than the focus would be if you were above water.
In order to focus on the virtual image you need to be able to focus close enough, the bigger your dome, the further away the virtual image, so the minimum focus distance of your lens is critical, the Tokina is capable of focusing very close so it’s ideal for underwater photography through a dome port, check the minimum distance of your lens and think about buying a bigger dome if necessary.
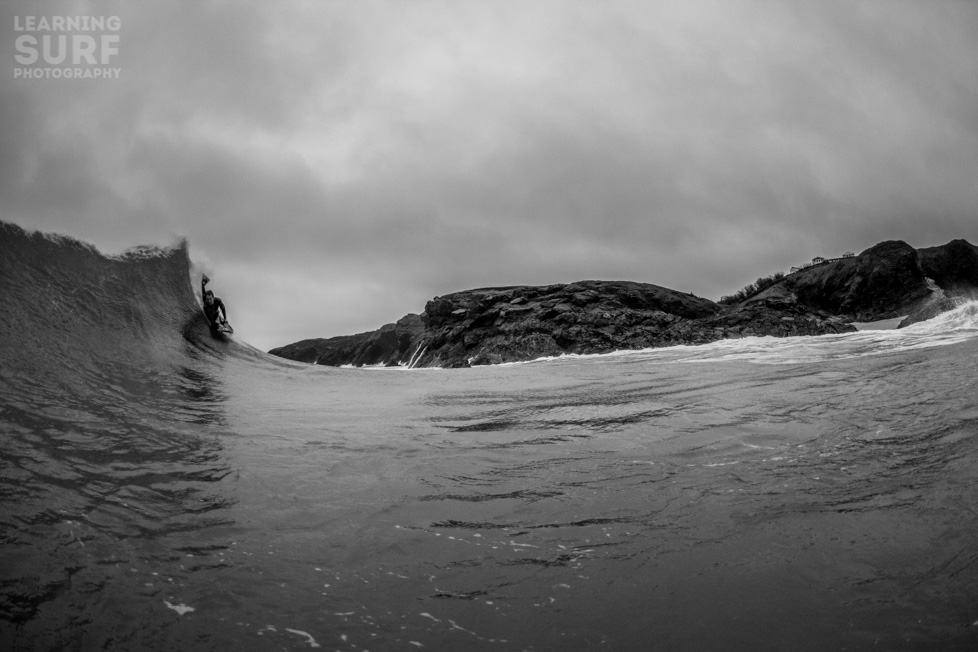
This underwater photo was taken with a Tokina 10-17mm fisheye through an 8″ dome port, ISO 100, 10mm, f4.5, 1/1000
Even with these strange characteristics, shooting through a Dome port is the best option when taking photo’s underwater, I’m not going to go into detail here but you can read all about it if you follow the links at the bottom of the post.
Over-Under – Large Dome Port
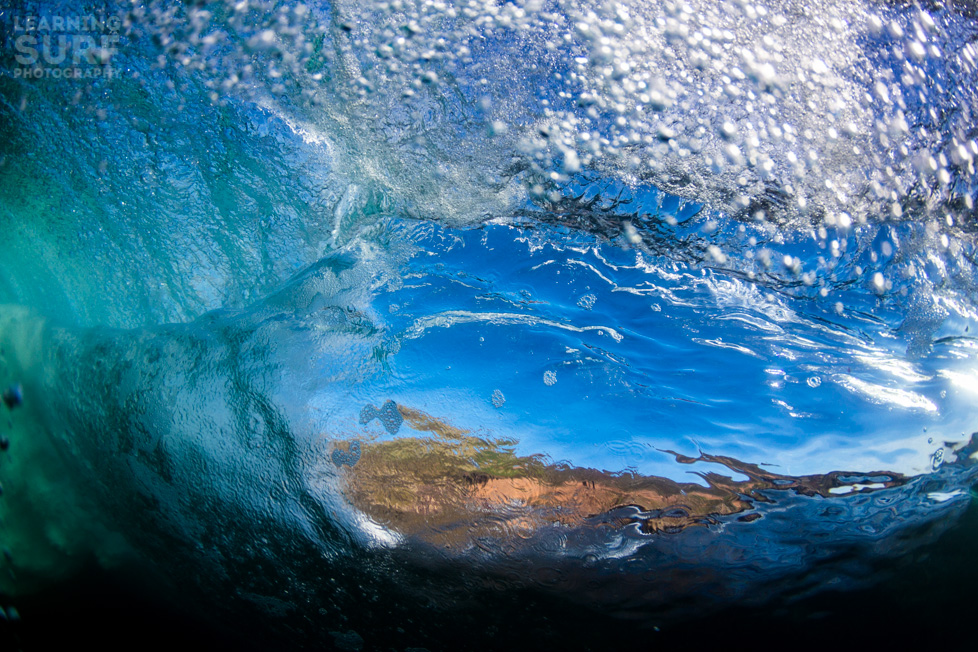
If you want to shoot good over-under style photo’s, where you can see above the surface and below in the same shot, you really want a large dome port, the further the dome is away from the lens, the more defined the line of water separating the two halves of the photo will be.
An over-under photo shot through an 8″ dome port, ISO 100, 10mm, f4.5, 1/1000
In this image I’ve placed the dome port half under the water in portrait orientation to have the best chance of getting a view of above and below the water, I cropped it in Lightroom for composition afterwards, I used an 8″ dome port to get the relatively crisp water line, you might have seen the much bigger dome ports that are available, well this is the style of shot that they’re designed to be used for.
This is an SPL dome port designed for over-under photographs
Up to 20mm Wide Angle Lens = Dome Port
Ultra wide lenses, like the Sigma 10-20mm are often best paired with a dome port too, you can get dome ports with zoom controls if necessary but often it’s easier to shoot with the lens pre-set to the required focal length with the focus on manual, to avoid any focus issues.
The dome port is also most suitable for this rectilinear, non fisheye wide lens, ISO 200, 10mm, f6.3, 1/1000
The shot above was taken using the Sigma 10-20mm lens and a dome port.
20mm And Over Prime Lens = Flat Port
Ports are expensive, sometimes more expensive than the lenses that go inside them, so it’s easy to try and save some pennies by using a dome port with your fisheye and your longer lens, this can work out OK, but in my experience you will run into focusing issues if you go down this route.
Nowhere in this image is sharp, an issue that could be avoided by using a flat port, ISO 100, 50mm, f2, 1/640
This shot was taken with the Canon 50mm f1.8 lens using my dome port, although at f2 there’s a very narrow depth of field and 1/640 is not as fast as it could be, no-where in the shot is in sharp focus, I believe this is due to shooting through a dome port and using the wet port technique leaving a film of water on the outside of the port, which throws off the focus.
I have got a handful of crisp shots using a 50mm in the dome, but many more are useless because of the wet port issue.
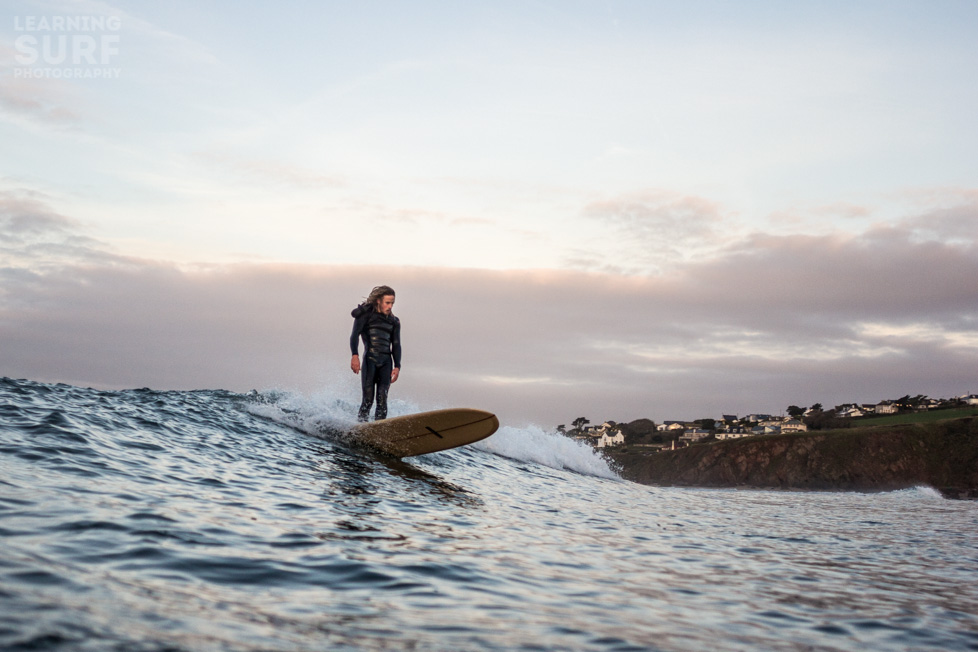
Even the low light of a dawny session didn’t cause any focusing problems with the 28mm lens shooting through a flat port. ISO 200, 28mm f2.8, 1/800
Using a flat port and using the dry port technique will result in many more sharp, in focus photo’s. I use my basic flat port with my 28mm and 50mm lenses and it works perfectly, I have my camera on auto focus mode when using the flat port.
Telephoto Zoom Lens = Flat Port With Zoom Control
I haven’t actually invested in a large zoom port for my Aquatech housing yet, for now I’ve made do shooting with my 70-200mm f4 lens in my Aquapac DSLR case, I wouldn’t want to take it out in big beach break waves but if there’s a nice big channel to sit in it works pretty well.
Any big lens like this obviously needs a port to match, the Canon 70-200mm f4 is a popular lens for water photographers because it doesn’t change length when you zoom and it’s relatively lightweight compared to the f2.8 version, the range of focal lengths are also really handy for shooting a shifting peak.
Shot with the Canon 70-200mm in an Aquapac DSLR case, ISO 160, 70mm, f4.5, 1/1000
This shot of an empty barrel shows how you can get close to the action (this is at the bottom end of the 70-200mm zoom) without being in much danger of taking a wave on the head, the zoom control comes in very handy in this type of situation, especially if the waves aren’t too predictable.
External links and resources
- Water Housing Users Guide – Part 1 – Basics
- Water Housing Users Guide – Part 3 – Prevent Water Drops, Wet Port Vs Dry Port
- Cameras underwater flat port vs dome port: http://www.camerasunderwater.co.uk/articles/optics/flat-vs-dome
- Underwater photography guide on dome ports: http://www.uwphotographyguide.com/dome-port-optics
- Over Under split photography guide on uw photography guide: http://www.uwphotographyguide.com/over-under-split-photography
Leave a Reply