In the first part I discussed my first couple of outings on my 12’6″ inflatable SUP, since then I’ve taken my camera out on it plenty of times and I’m almost ready to put together a little dos and don’ts about using a water housing on your board, but firstly I wanted to write about making and using an anchor system.
One of the first things you’ll notice when you start paddling an SUP is that it’s very rare to remain still for any length of time, between wind, tide and river flow you’re almost always drifting one way or another when you stop paddling. In order to take a decent photograph (or go fishing if that’s your thing) you’ll likely want to make an anchor system.
Disclaimer
This is not a safety device, I only use it to temporarily secure the SUP in place while I go for a surf or to take photo’s, be aware of your position, the tide, wind and weather forecast, always tell someone where you’re going and when you’ll be back, wear a bouyancy aid and don’t use this system if you’re not confident enough to get to safety without your SUP (and unless you’re happy to lose your SUP and all that’s attached to it forever). Just be sensible, this isn’t going to prevent you getting swept away by the tide, wind or current, if you aren’t 100% certain you can swim to shore don’t go out on your SUP.
Back to the fun part:
I did a bit of research and found a few useful resources, mostly from kayak fishing websites, a lot of this general info can be applied to your SUP but I needed to make a few tweaks before I was happy with a photography friendly SUP anchor.
What You Need
This is what works for me, I weigh around 90kg and my SUP is 12’6″ and inflatable, so it sits quite high in the water, this system keeps me in one place against a reasonable wind and tide.
- lightweight anchor – £9 – I chose a small, cheap, folding anchor
- pack of cable ties – £6 for a pack of 100
- dive reel with plenty of line – £25 for an 83m line
- bungee cord – £4 – if you haven’t got one lying around
- 2 x carabiners – £4
- 1.5m of chain – £5 – I got mine from the local DIY shop but you can buy it by the metre on line too
Total cost, around £50, I keep it all in a roll top bag that I can lash to the deck of the board easily.
How it works
The Anchor has a loop at the top and bottom, mine came with a U bolt so I used that to fasten the chain to the bottom of the anchor, then you use a cable tie to attach one of the chain links to the top of the anchor, leave a little slack when you attach the chain.
Make sure your cable tie is capable of being broken if you pull on it hard, having this weak link in the system means if you get snagged you can pull up on the line to snap the cable tie which then allows you to raise the anchor from the bottom, this should pull it closed and bring it up upside down, releasing it from the snag.
Buy a big pack of cable ties, they’re always useful and you need a few spares in case yours needs to be sacrificed to save your anchor.
The chain helps weigh the anchor down and gives it a chance to catch on the sea bed, attach the end of your chain to the end of the dive reel, mine has 83 metres of strong line on it, that’s more than I’ll ever need even if I do have to cut it free at any point, it’s also kept neatly on a ratcheted reel making it relatively easy to keep it out of the way and release the line slowly if necessary.
Many kayak sites will tell you to use an anchor trolley, basically it’s a bad idea to attach your anchor to the middle of your vessel, it’s always best to have it coming off the front or back, that way the board/kayak/boat will turn into the current or wind and not get flipped over.
The trolley is a pulley system which allows you to attach the anchor in the middle then pulley it around to the front or back of the kayak, it also offers some slack to allow for waves, this is what the bungee is for in my system.
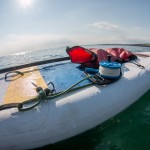
It’s not as important with an SUP to be able to retrieve the anchor from the middle because you can easily make your way to the front or back of the board to pull it in, however I’ve found it much easier to pull up the anchor and prevent tangles by pulling from the middle, so I use the two carabiners to make this possible.
I attach one carabiner to one of the handles in the middle of the board and the other to the nose or tail ring on the SUP (the tail is easier as it’s considerably wider on my board), then the dive reel gets clipped to the middle one and the line is fed through the one at the end and into the sea. The front or back carabiner also acts as a failsafe in case the bungee cord or first carabiner breaks, the dive reel is on a ratchet and it’s not going to fit through the carabiner so if it becomes loose it will either fall off the board and dangle until retrieved or get caught on the carabiner.

Next Steps
So far I’ve tested it a couple of times and it’s worked as planned, the next step is to use it when there’s some real swell, there’s already a couple of spots I’d like to check out on the board and having a way to anchor the board whilst I go off to surf or take photo’s will be really useful, another purchase will be a tall flag of some sort so I can easily keep an eye on the board whilst I’m off surfing or shooting.
I’m also working on a better way to have my camera available to shoot with more quickly and easily from the board as it’s a bit of pain at the moment having to stow the paddle and reach down to grab it every time there’s a shot.


Leave a Reply